
I love cute little DIY projects but unfortunately I don’t get the chance to dive into my craft supplies very often so I asked Gemima to do a guest post on Christmas DIY. And here it is!
This is a very simple, easy to make DIY to do at home. It’s a great Christmas activity to do with kids, or if you’re a bit craftily challenged like me but want to have a go at making something festive.
You will need:
Moulding Clay
Cookie cutters or a knife
Rolling pin
PaintRibbon
Festive spirit

I used white air drying clay from Hobbycraft, which was very easy to use and dried overnight. I really enjoyed moulding the clay into different shapes and doing something creative with my hands, it was quite therapeutic! For the round shapes I used cookie cutters and the others a sharp knife to cut an outline.

Take a lump of clay and roll it out to about 5mm thickness (minimum), then simply cut whatever shape your heart desires. I used the end of a paintbrush to stamp out a hole at the top of the shapes (not too close to the edge) to hang the ribbon through.
I also used a set of letter stampers from Amazon to write little messages on mine, but this would be super easy to do with a cocktail stick. You could even etch little illustrations and Christmas patterns in them.

Once you’re happy with your shape, avoid poking and prodding them like I did else they might break. My poor silver snow angel lost her head because I was a bit too impatient for them to dry. After a good eight hours or so they’ll be ready to paint. This clay dried out to a very nice cream colour which looked fine unpainted too.

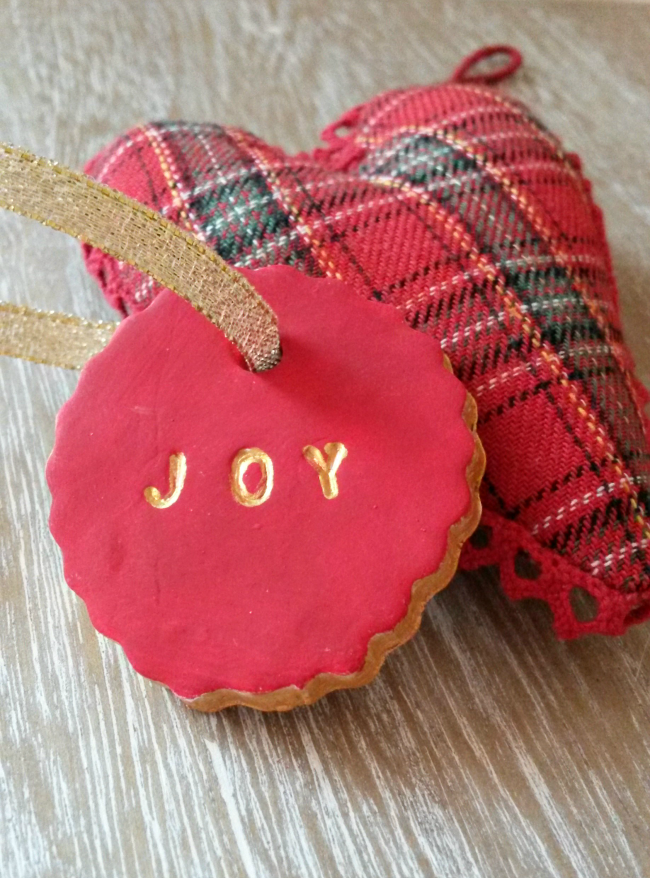
My favourite is the little ‘Joy’ ornament. I painted the edges with metallic gold to contrast the red and dipped a cocktail stick into the same gold to paint the letter indentations. It turned out really cute! Another fun one is the little Christmas tree, which I used gold glitter nail varnish for the baubles.


I had a lot of fun with this DIY and I’m really happy with how they turned out. I also made a few extra ornaments to give to my friends. I always think handmade presents make lovely gifts. Are you making Christmas ornaments this year? Let me know if you have a go at making these ones 🙂
You can read more of Gemima’s blogposts at Lovely Witches.
And if you like baking and want to get even more into the festive spirit make sure you check out my recipe for walnut & cranberry oatmeal biscuits! Or you can check out my other DIY posts here.
Bloglovin | Sparkle Motion | Instagram